
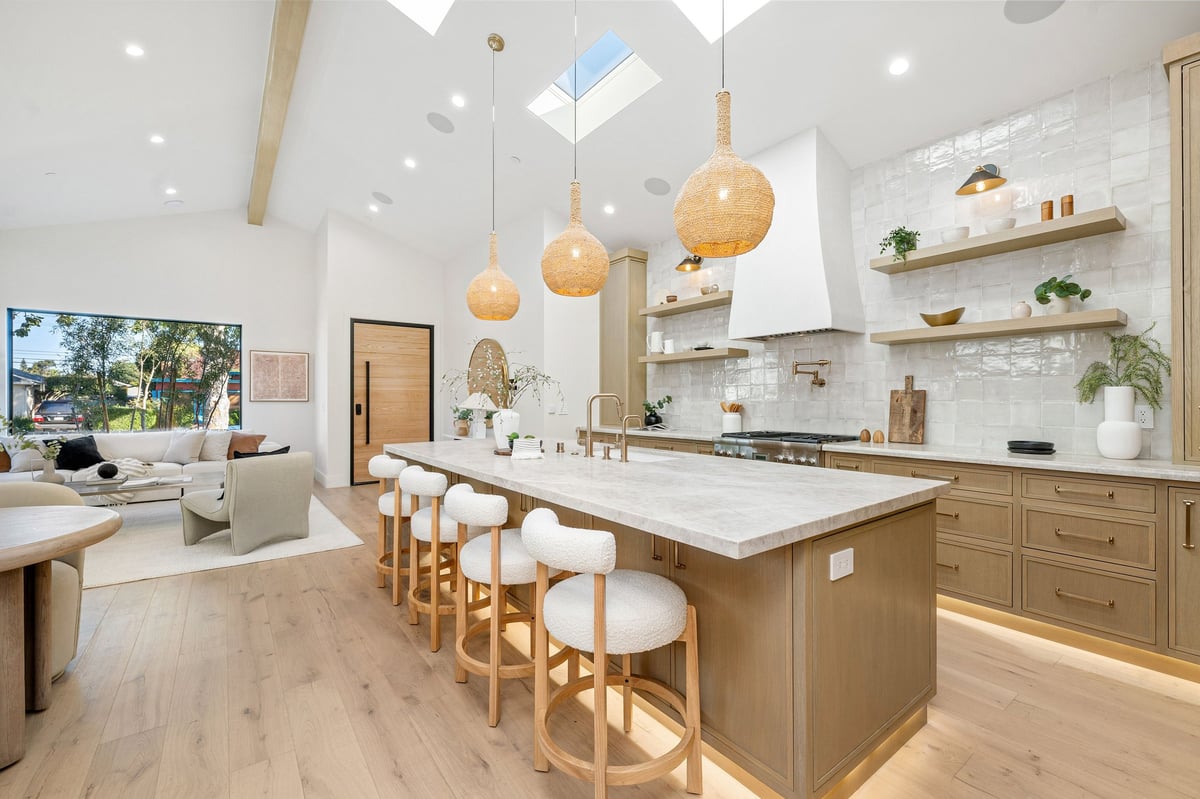
A well-lit kitchen needs more than a bright ceiling fixture. Good kitchen lighting design in Houston combines the right light for food preparation with comfortable ambient illumination and details that make your cabinets and finishes stand out.
If you’re planning a remodel, explore our kitchen remodeling services and electrical services early, before your layout and walls are finalized.
The goal is a coordinated plan: fixtures should complement one another, suit your ceiling and work zones, and operate together without glare or flicker. Here’s how to plan the layers, what to consider for your kitchen’s layout, and what kitchen lighting layout cost may look like in 2026.
1. Four Lighting Layers That Work Together
A balanced kitchen plan uses several types of light for different purposes. You don’t need a separate fixture for every function, but each work area should be adequately lit and controls should let you adjust the mood.
Ambient
General light for the whole room — recessed cans, a flush mount, or a layered ceiling plan that keeps even light across the kitchen.
Task
Focused light on work surfaces: under-cabinet lighting over the counter, and pendants or cans over the island and prep zones.
Accent
In-cabinet lighting for glass-front displays, toe-kick lighting, and fixtures that highlight materials and finishes.
Decorative
Pendants and statement fixtures that define the island and bring personality to the space.
Start by considering the room’s main activities and how daylight moves through it. Then coordinate fixture locations, brightness, and controls so one layer supports the next. For more detail on specific fixture types, see our guides to recessed lighting installation and under-cabinet lighting installation.
2. Plan for Ceiling Height, Room Size, and Work Zones
Ceiling height and room size affect how many fixtures you need, how widely light spreads, and how large decorative fixtures should appear. A tall ceiling may need fixtures with suitable output or beam spread to bring light down to the work surface. A compact kitchen can feel crowded if oversized pendants compete with cabinets or obstruct sightlines.
For recessed fixtures, spacing based on ceiling height can be a useful starting point: around four feet apart for an eight-foot ceiling, with spacing adjusted as ceiling height and the fixture’s light output change. In kitchens, placement also matters. Plan the lights in relation to counters, the island, and where you stand while working. A ceiling light placed directly behind you may cast a shadow across the countertop; the layout should direct light onto the work zone instead.
Island or peninsula = its own task zone
Pendants can add focused light and visual definition, while other ambient lighting keeps the surrounding room comfortable.
Under-cabinet lighting
Planned to illuminate the counter directly, not wash light onto the cabinets.
In-cabinet lighting
Highlights glass-front displays and open shelving. Keep fixtures and wiring in mind when finalizing cabinet locations.
3. Size and Hang Decorative Fixtures Carefully
For island pendants, a common planning range is to hang the bottom of the fixture about 30–36 inches above the countertop. Choose a total pendant width that occupies roughly half to two-thirds of the island’s length, leaving breathing room at the ends. The final number, size, and position depend on island dimensions and how you use the space.
For a chandelier or other statement fixture, add the room’s length and width in feet; that total, in inches, is a common starting estimate for fixture diameter. For example, a 12-by-14-foot room suggests a fixture around 26 inches wide. In an open kitchen, use this as a guideline, not a substitute for considering ceiling height, island scale, and adjacent living areas.
4. Choose Color Temperature and Color Quality
Color temperature, measured in Kelvin (K), describes whether light looks warm or cool:
| Color Temperature | Look and Best Use |
|---|---|
| 2700K | Warm and soft; often suits traditional finishes and cozy spaces |
| 3000K | A balanced warm white that works well in many kitchens |
| 4000K | A cooler, crisper look that may suit contemporary or task-focused spaces |
Consistency matters. If ceiling lights, pendants, and cabinet lighting have noticeably different color temperatures, the kitchen can look patchy, especially in an open-plan home. Choose a compatible temperature across the layers, and check how it looks beside your countertops, cabinets, and wall color before committing.
Also check the CRI, or Color Rendering Index. CRI describes how accurately a light source reveals colors. A higher CRI — 90 or above — is a useful target. It can help food, wood grain, paint, and stone look more natural than they may under a lower-quality light source.
5. Make Sure Dimmers and Controls Are Compatible
LED fixtures and their drivers, the components that regulate power to the LEDs, must work with the selected dimmer. An incompatible dimmer or driver can cause flickering, buzzing, uneven dimming, or lights that won’t turn down smoothly. Confirm compatibility for the specific products you’re installing; an LED label alone doesn’t guarantee every dimmer will work.
Layered controls give you practical options. For example, you could use separate switches for ambient, island, and cabinet lighting; set a bright cooking scene; and use a lower, warmer setting for evening meals. Smart controls can add scheduling or app access, but they still need compatible fixtures, dimmers, and wiring.
Non-negotiable: electrical connections, new circuits, and installation must meet applicable safety requirements. Have a qualified professional review the plan, especially if you’re adding circuits or changing existing wiring.
6. 2026 Kitchen Lighting Cost Guide
Costs depend on fixture choices, the number of work areas, ceiling access, wiring conditions, and how much of the kitchen is being updated. These are planning ranges, not a guaranteed quote, and your estimate should identify what’s included.
| Package | 2026 Planning Range | Typically Includes |
|---|---|---|
| Small Kitchen | $1,800–$4,500 | A modest number of ceiling fixtures, island lighting, cabinet task lighting, basic dimmers |
| Larger / Comprehensive | $5,500–$12,000+ | More fixtures, additional controls, premium decorative lights, new circuits, wiring concealed behind finished surfaces |
Existing electrical conditions and fixture selections can shift the total. Before comparing bids, check whether the estimate includes fixtures, installation, switches or dimmers, wiring, patching, and any necessary permits or inspections. Ask what might change the price once work begins.
7. Plan the Lighting Before Drywall Closes
A remodel is the best time to coordinate lighting with the rest of the kitchen. Finalize the cabinet and island plan first, then map fixtures and switches against the work zones. Before drywall closes, confirm wiring routes, fixture positions, switch locations, dimmer compatibility, and any new circuits. If you wait until finishes are in place, adding or moving wiring may mean extra labor and repairs.
Homeowners in The Woodlands, Conroe, Montgomery, Magnolia, Willis, and greater Houston can benefit from reviewing lighting alongside cabinetry, countertops, and electrical work. A single coordinated plan helps reduce mismatched finishes, awkward switch locations, and unnecessary rework.